
There’s an old audio engineering saying that my college professor used to say: “Garbage in, garbage out.” What he meant is if your original recorded audio is of poor quality, then the final product is not going to sound much different. (i.e. you can’t polish a turd) This starts with the instrument tuning and volume, audio interface volume levels, and digital audio workstation (DAW) settings. It’s a simple thing, but it needs to be said… tune your instrument every time you plug it into the audio interface, and be aware of how quickly it can become out of tune. All it takes is a slight change in temperature to expand or contract the strings. After tuning, be sure your instrument and audio interface volume levels are where they need to be. When doing volume checks, I try to have my instruments peak around ¾ of the maximum waveform (diagram 1). Play the instrument loudly and notice where it is peaking, then adjust the volume knobs on the instrument and audio interface to set your level. Avoid letting any part of the waveform hit the top or bottom of the track because it will get clipped and cause unnecessary distortion in the mix.
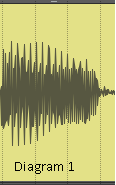
Once you’re satisfied with your levels, turn your attention to your DAW. If you’re recording an instrument with a direct input (bass, guitar, vocals) it’s best to record it on a mono track as opposed to stereo. These instruments begin as a mono source and recording them that way creates a cleaner mix and allows more space for each instrument. If the track is in mono it should look like Diagram 1, with a single waveform. This setting can usually be found in the track settings, but it varies depending on the DAW.
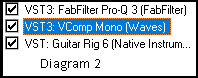
A major component of an instrument’s final sound is the effects (FX) that are applied to it. When you begin adding FX and manipulating your sound, keep in mind that the order of your FX matters. The audio signal will start at the top FX and pass through every other one on its way to the bottom. Equalizer (EQ) is usually the first FX applied because it creates a cleaner sound to send down the chain. If there’s a common set of FX you find yourself using, save it as an FX chain. This will allow you to load it up anytime with the exact same settings already in place. Diagram 2 shows the typical FX chain I use for my bass guitar. The sound starts by going through an EQ, then through a compressor before hitting Guitar Rig where the amp effects are applied.
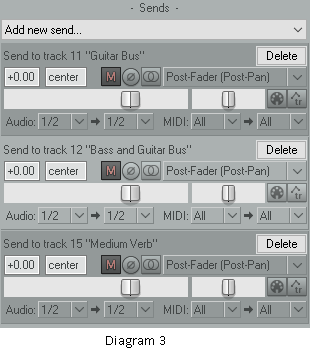
Finally, track routing is an essential part of creating a professional mix. Simply put, it means to send/bus/route a copy of an instrument’s sound to another track for additional effects before sending it back into the mix. Multiple instruments are usually sent to the same bus track to help them blend together and create a cohesive mix. The bus tracks are a chance to apply additional detailed EQ and compression and may be used to help tame some of the effects already applied to the instruments. These extra tracks will also help support the original sound, fill in the mix, and give it a more professional sound. Diagram 3 shows how I routed one of my guitar tracks to be sent to the Guitar Bus, Bass and Guitar Bus, and Medium Verb. For a more detailed look at track routing, please take a look at my third article “In-Depth Track Routing.”
It may seem overwhelming at first when you think about how many aspects there are to consider in audio engineering, but if you don’t strive for perfection then you’ll never come close. Clean recordings, proper FX placement, and track routing are all essential pieces of the audio engineering puzzle.